Autumn has arrived, and Halloween is not far away! Here are some perfectly spooky activities that will delight your child’s sense of touch and enhance their fine motor coordination in the process. These projects can get a bit messy, so make sure to wear a smock and put a washable cloth/mat on your workspace such as a garbage bag or a cardboard box.
 Rachel McMinn |
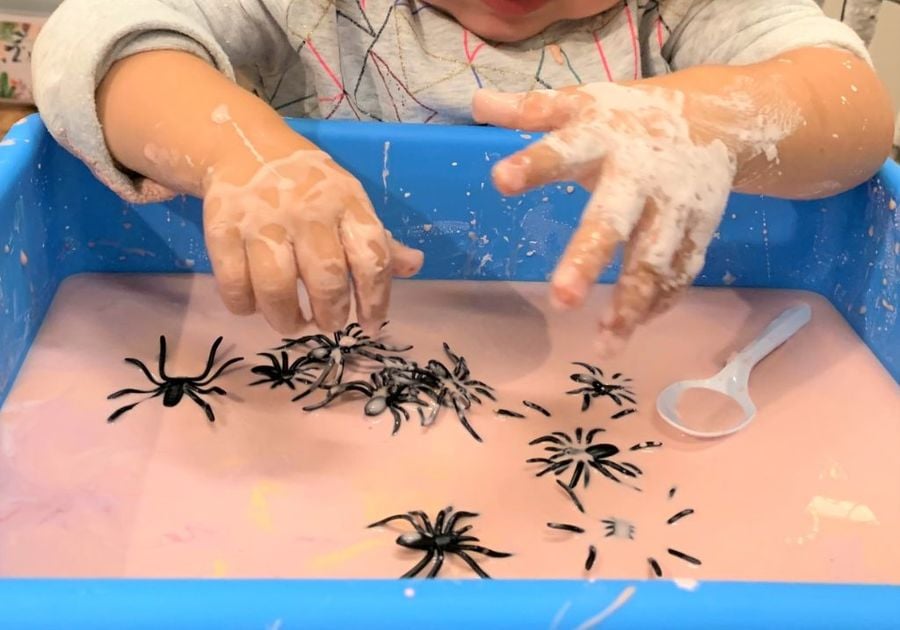
Orange Oobleck with Spiders
Materials needed:
- 2 cups cornstarch
- 1 cup water
- About 3 - 5 drops of food coloring (orange, purple or black are highly recommended)
- Plastic spiders (or other spooky-themed plastic toys)
Directions:
1. Combine the cornstarch, water, and food coloring. It should be hard to stir – Oobleck (an invented word for this stuff) is a non-Newtonian fluid that rapidly moves between solid and liquid. The warmth of your hands and fingers melts the Oobleck and makes it appear runny, otherwise, it’s solid and hard to the touch! (I always use my hands to mix it to find out if it's too dry or runny then add more water or cornstarch to even things out.)
2. Once you have the proper consistency (it’s oozy and gloopy and drips easily from your warm hands, but can also be picked up and rolled in a ball before melting), add in your spiders or other fun Halloween-themed toys and let your child explore!
3. A colander or plastic fruit basket is another fun thing to play with for can oozey and dribbley fun!
Don’t let the mess intimidate you, it’s very easy to sweep and clean the Oobleck. Once it dries, it’s back to the powdery cornstarch consistency.
 Rachel McMinn |
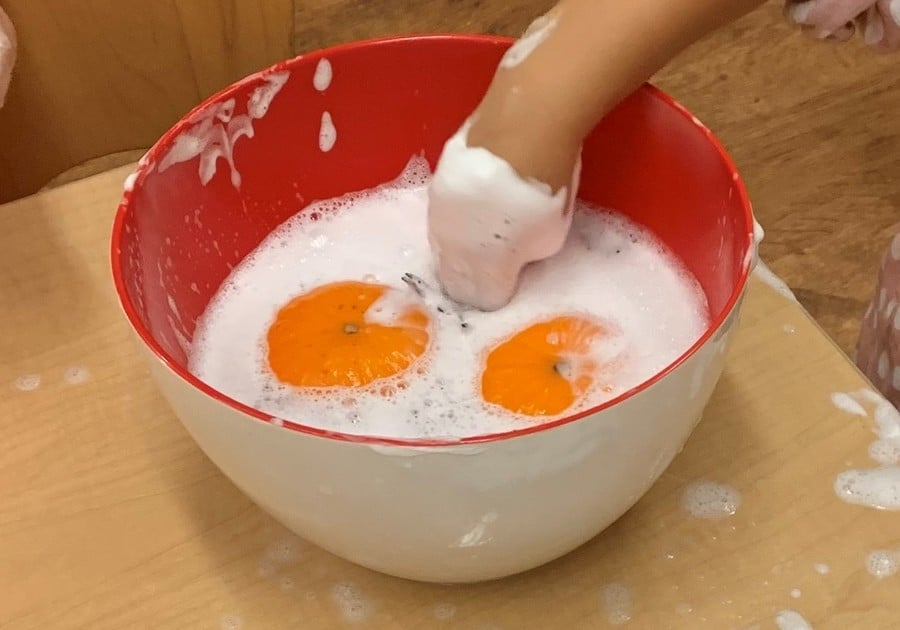
Mini Pumpkin Bath
Materials needed:
- Mini pumpkins or gourds
- Shaving cream
- Washcloth
- Bowl or bin of warm water, mixed with a little tear-free baby soap
- Paintbrushes
- Sponges
- Small cup for pouring
Directions:
1. Do your kids love to wash things? It's time to give our pumpkins and gourds a little bathtime! In a bowl or tub, squirt a desired amount of shaving cream and provide paintbrushes, sponges, and a small washcloth. Your child can observe and experiment the interaction between the shaving cream and pumpkin as it becomes slippery and fun!
2. In a separate bowl or tub, mix tear-free baby soap with warm water. Let your child to transfer the pumpkins between the two different mixtures.
4. Use sponges and washcloths to rinse and dry the pumpkins.
Water play is soothing but also teaches so many wonderful concepts – buoyancy, how water changes shape to fit the container, pouring, independence, and so on. This could easily be done during bath time as well!
 Rachel McMinn |
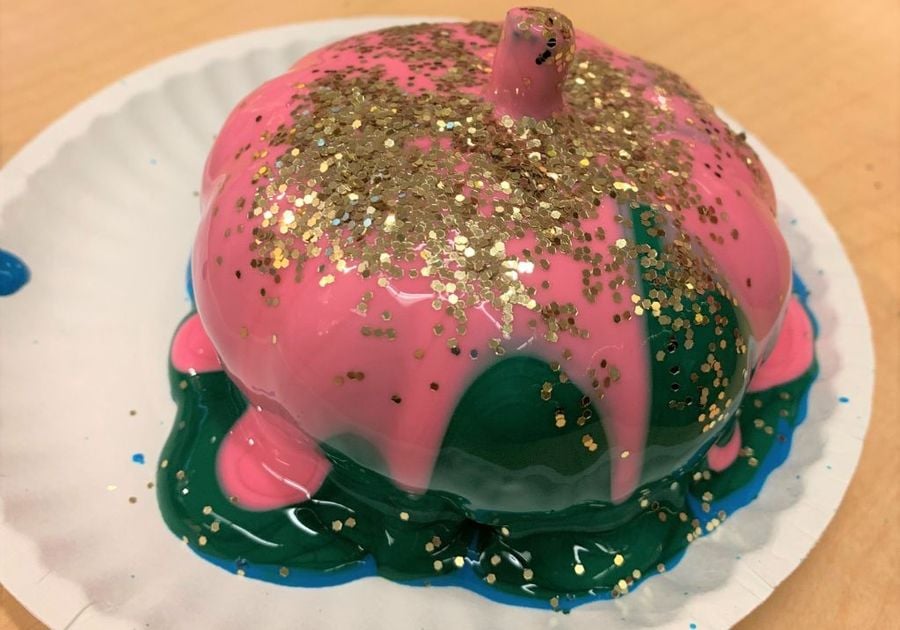
Pumpkin Pour Painting
Materials needed:
- Tempera paints
- Elmer’s glue
- Water
- Plastic cups
- Pumpkins
- Paper plates/butcher paper
- Glitter
- Mod Podge
Directions:
1. Gather all your materials together.
2. Pour each paint color into a plastic cup with one tablespoon of Elmer's glue. Mix together. Add one tablespoon of water to help thin it out. This will help it pour easier and cover the pumpkin. Set prepared colors aside.
3. Place your pumpkin in a cardboard box, on a paper plate, on some butcher paper, or another thick material so the paint will not leak through.
4. Select each paint one at a time and pour it directly onto the pumpkin. Watch as it drips down, covering the pumpkin in a beautiful pattern. Continue until you use all of your desired colors. If you like glitter (sorry -- it's banned in our house, lol) you can also sprinkle some of that on top for a final touch!
5. After your pumpkin has completely dried, apply a layer of Mod Podge to seal the paint and add a glossy finish to your pumpkin.
 Rachel McMinn |
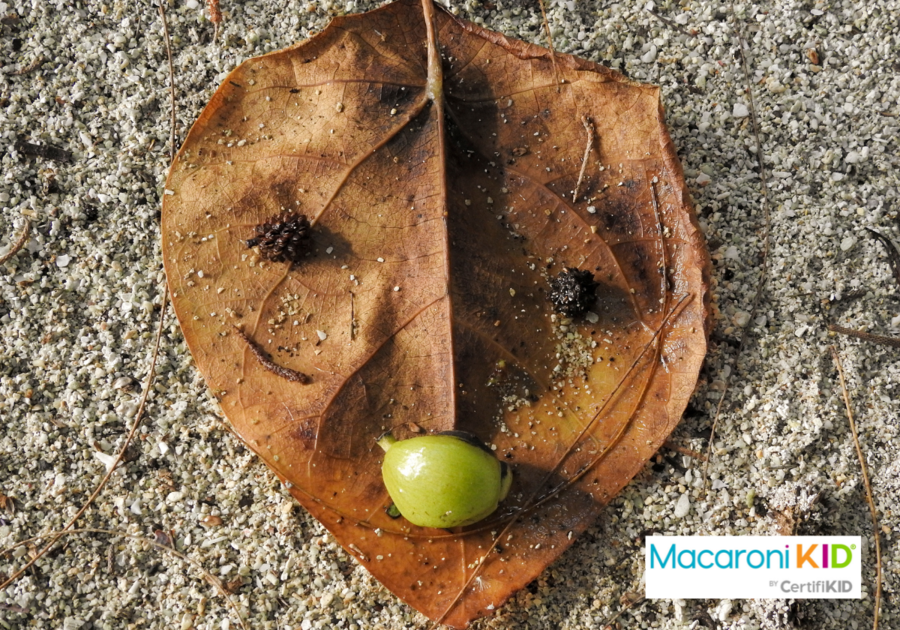
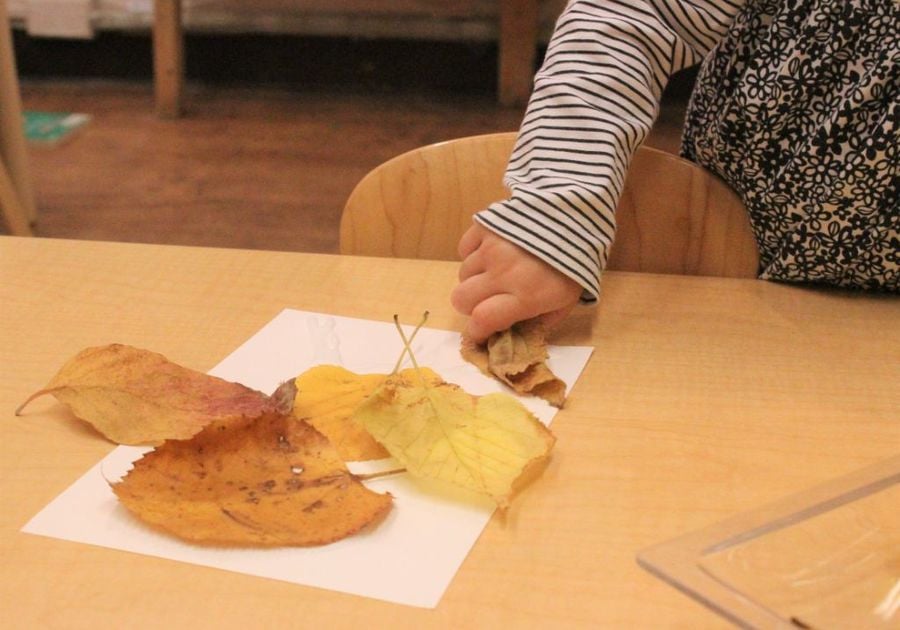
Leaf People Project
Materials needed:
- Assortment of leaves, acorns, small stones, sticks in various shapes and sizes
- Elmer’s glue
- Cardboard or thick cardstock
Directions:
1. Go outside and have a nature scavenger hunt. Gather different sizes and shapes of fallen leaves, acorns, sticks, or other interesting materials. Go inside and get ready to get creative!
2. Let your child explore the materials in an open way. Acknowledge the size, texture, color of what you have collected and take a moment to talk about how it feels. Once your child is ready, it's time to choose body parts for a leaf person – head, eyes, nose, hair, hat, mouth, ears, body, arms, legs, and whatever else they think to add.
3. Help your child glue the leaves onto the card stock to create a cute leaf person to display!
Rachel McMinn is an early childhood educator at Buckle My School Preschool in Tribeca, N.Y. She holds a Masters in Early Childhood Education from Hunter College and a Writing degree from Pratt Institute. This article originally appeared in Macaroni KID Lower Manhattan.